Processing and procedural instructions
Finished board products such as ebazell and ebaboard can be glued into larger blocks and then milled. Whereas the jointless ebablock® can be processed directly.
There are various casting processes for casting resins, which are used depending on the application. These include the build-up process on the one hand, and front-layer casting on the other.
A special process for the production of composites is the vacuum infusion process.
Some tips to make your project a success are shown here. The ebalta product managers support with their expertise and practical experience. Our experts assist in deciding on an application technique and in the selection of materials and with customer training.
Processing of solid polyurethane or epoxy resin moulds: Milling
Milling of plastics is widely used for processing models and tools. However, the milling resistance of plastics is lower than that of metal. You will receive the appropriate material-dependent milling parameters from us. You can find these on the product pages of our sheet material ebazell and ebaboard, block material ebablock®.
Milling contour blocks ebablock®
A custom contour block cast according to your individual specifications is milled to final dimensions. The result: a homogeneous, joint-free surface.
Milling of the modelling boards ebazell and ebaboard
The sheet goods ebazell and ebaboard are available in various standard dimensions. By cutting and gluing the boards, you build up a blank, which you then mill to the final dimension.
Milling of the modelling paste
In this manufacturing process, EP paste systems are applied by machine to a carrier body in a layer thickness of up to 35 mm. After curing, the model is milled to final dimensions.
Procedural notes for the build-up procedure
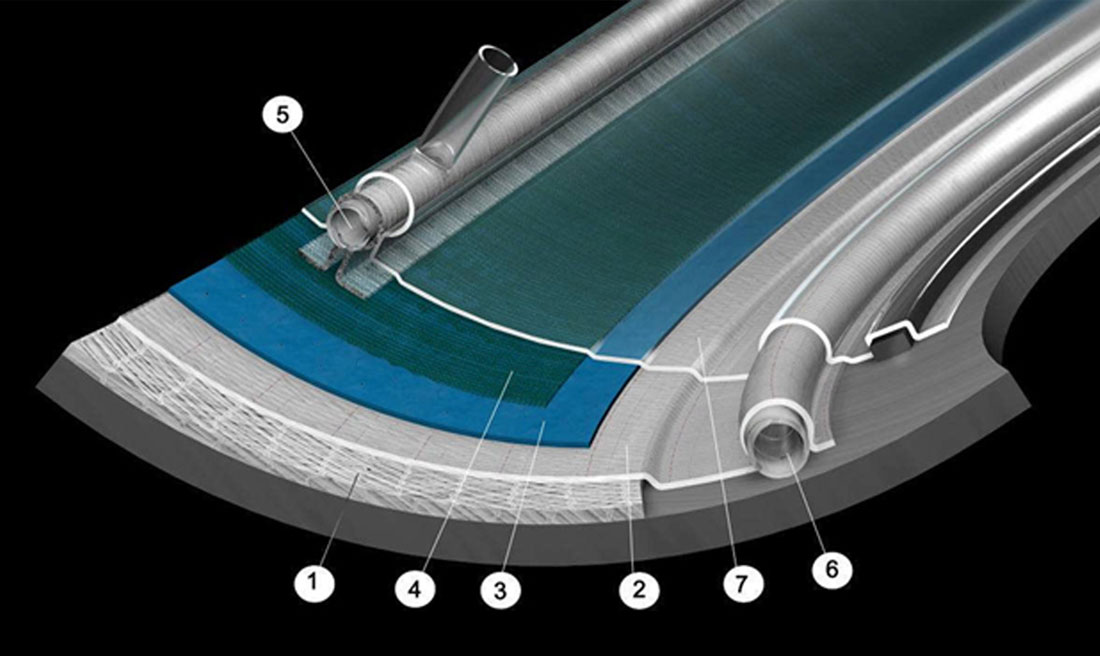
In the build-up process, models are provided with a surface resin, a coupling layer and a rear structure. These are cast, stamped or laminated.
Processing of Gel Coats
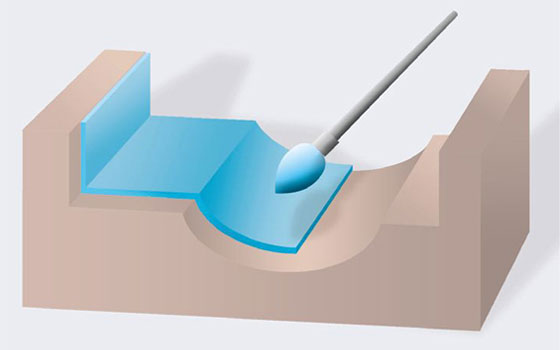
The surface resin is applied to the cut surface. It must be taken into account that edges and openings are first thinly pre-painted. In this way, air pockets can be avoided. After the surface has set finger-dry, a second coat of surface resin is applied. Two layers are recommended so that you achieve a higher layer thickness and thus stability. This is very important for subsequent sanding or polishing.
Apply the coupling paste
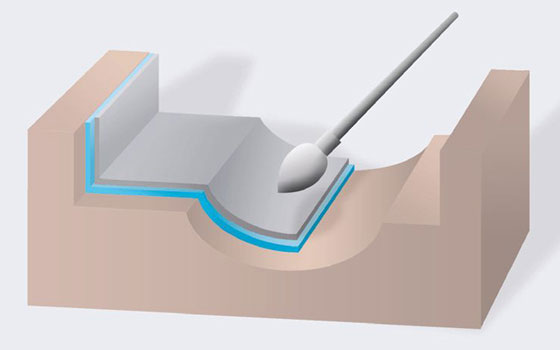
The coupling layer is applied in a layer thickness of max. 1 mm on the gelled but still tacky surface layer. It ensures good adhesion of the surface resin and guarantees a sufficiently long processing time for the following work steps.
Rear casting
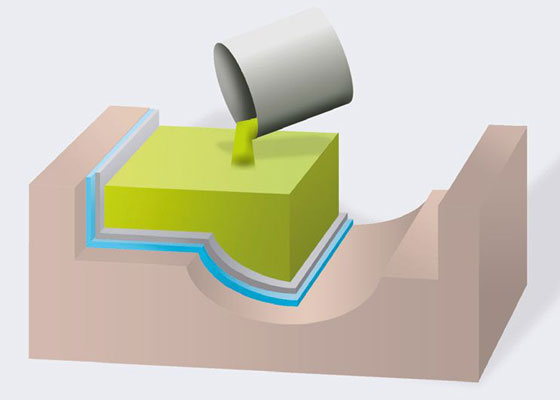
The rear end is cast with a casting resin system, which is usually enriched with granular fillers such as aluminium grit. This reduces shrinkage and less pure casting resin has to be used.
Rear end pitching
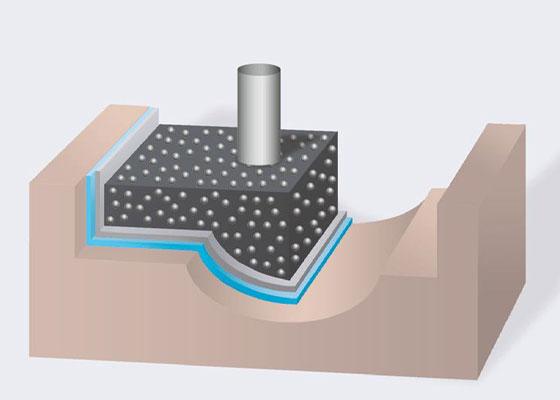
To tamp the backbone, a general-purpose resin is enriched with granular fillers such as aluminium grit. This mass is tamped onto the coupling layer in several layers. This processing step compacts the material into a compact mass that has a high compressive strength when cured and, depending on the filler, forms a good price-performance ratio.
Rear frame laminating
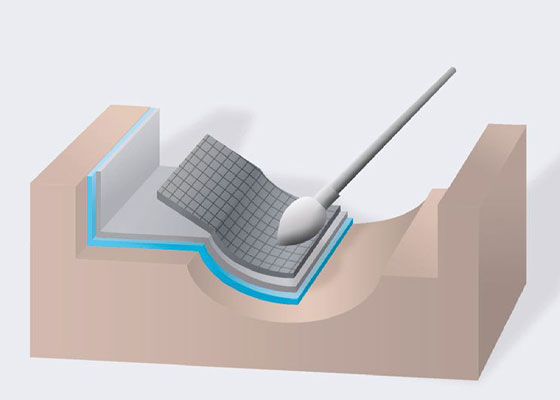
A laminate is constructed from glass fibre fabric and laminating resin. A laminate is produced symmetrically and with as little resin as possible. Laminate paste can also be used instead of fabric. The laminate layer is stiffened by a frame construction.
Casting process: Processing as front layer casting and solid casting
With the casting process, you quickly obtain a solid mould that you can further process. Common casting methods are front layer casting and solid casting.
With solid casting, the casting resin is poured solidly into negative moulds. It is therefore particularly suitable for small to medium volumes.
In front-layer casting, a readily castable resin system is poured in a layer thickness of 10-20 mm around a prefabricated carrier body or core. Large surfaces with complex structures can be optimally reproduced in this way.
Depending on the process and application, you can use different ebalta casting resin systems for this.
Making a negative mould
Negative moulds are made of ebazell foam sheets or Styrofoam, depending on whether one or more blocks are made in the mould. The negative mould corresponds to the contour of the later plastic tool or component.
Insert displacer
Displacers on the front or rear work against the buoyancy of the potting compound and ensure that material is saved, thus significantly reducing the milling time.
Potting in negative moulds
The corresponding casting compound is produced free of air bubbles by prior evacuation and poured into the prepared negative mould. This produces a jointless ebablock® with a high-quality surface.
Demoulding and deburring
In preparation for the annealing process, the inserted displacers are then removed from the ebablock® and the edges deburred.
Tempering plates and blocks
The deburred ebablock® goes into the oven for tempering. This is where the final strength values and freedom from stress are achieved.
Process instructions for vacuum infusion for composites
The vacuum infusion process is suitable for producing composites quickly. This gives tools and components a perfect surface.
ebalta offers suitable ancillaries for vacuum infusion.
Processing of first-class composite parts
Special manufacturing processes are used for composite parts that have to fulfil a high degree of strength and durability. In vacuum infusion, for example, a higher fibre or lower resin content is achieved for the same component weight.
